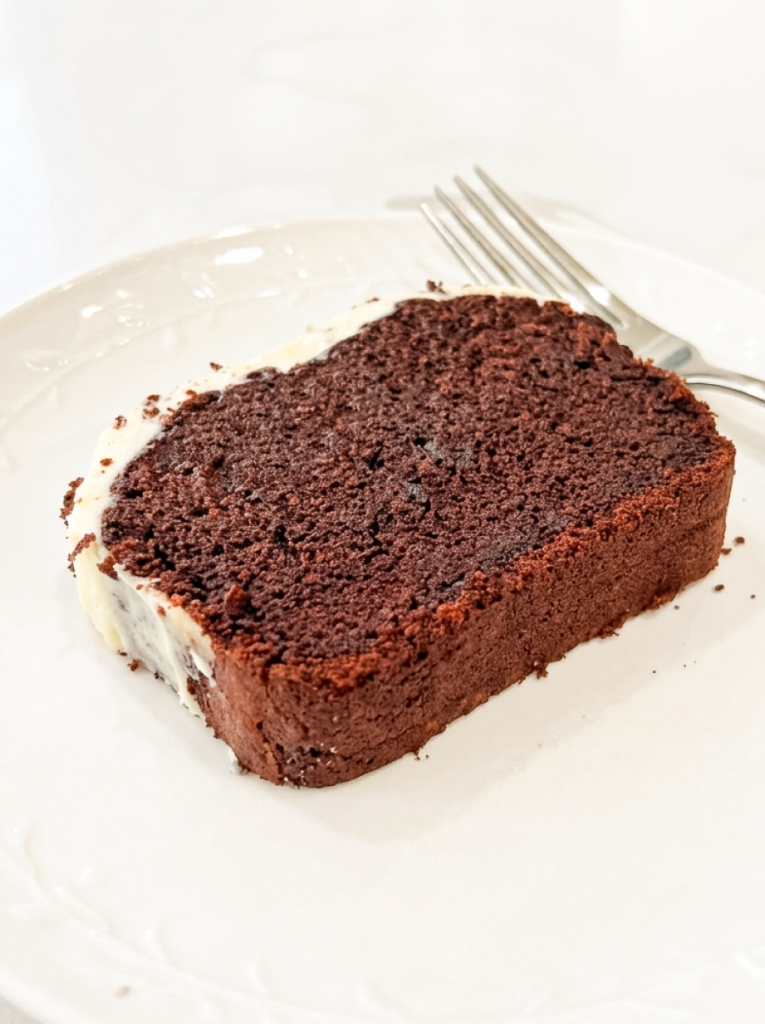
This red velvet loaf cake is soft, cocoa-forward, and properly red, just the deep crimson you look for in red velvet. The crumb is tender without being crumbly, and the cream cheese frosting on top is tangy enough to cut through the sweetness.
The loaf pan makes this easier than stacking layers for an actual cake, but you still get that classic red velvet flavour: subtle chocolate, a hint of tang from the buttercream, and a texture that’s somewhere between pound cake and chiffon. I used hot water in the batter because it blooms the cocoa and keeps the crumb soft even a day later.

I made this when I wanted red velvet but didn’t want to deal with cake rounds, parchment circles, and the structural anxiety of layering. Turns out a 9×5 loaf pan solves most of those problems!
Why you’ll love this recipe
- No mixer for the cake – everything whisks together by hand in two bowls!
- That classic deep red colour – red velvet emulsion holds its colour through baking better than liquid dye.
- Soft crumb that doesn’t dry out – the hot water keeps the texture tender even on day two, which most red velvet recipes can’t pull off. 🙂
Ingredients
- All-purpose flour
- Unsweetened cocoa powder
- Baking powder
- Salt
- Large eggs
- Granulated sugar
- Unsalted butter
- Milk
- Vanilla extract
- Hot water
- Red velvet emulsion or red food colouring
- Cream cheese (brick-style)
- Powdered sugar
Equipment
- 9×5 inch loaf pan
- Parchment paper (or butter for greasing)
- Stand mixer or hand mixer (for frosting only)
- Piping bag or offset spatula (for frosting)
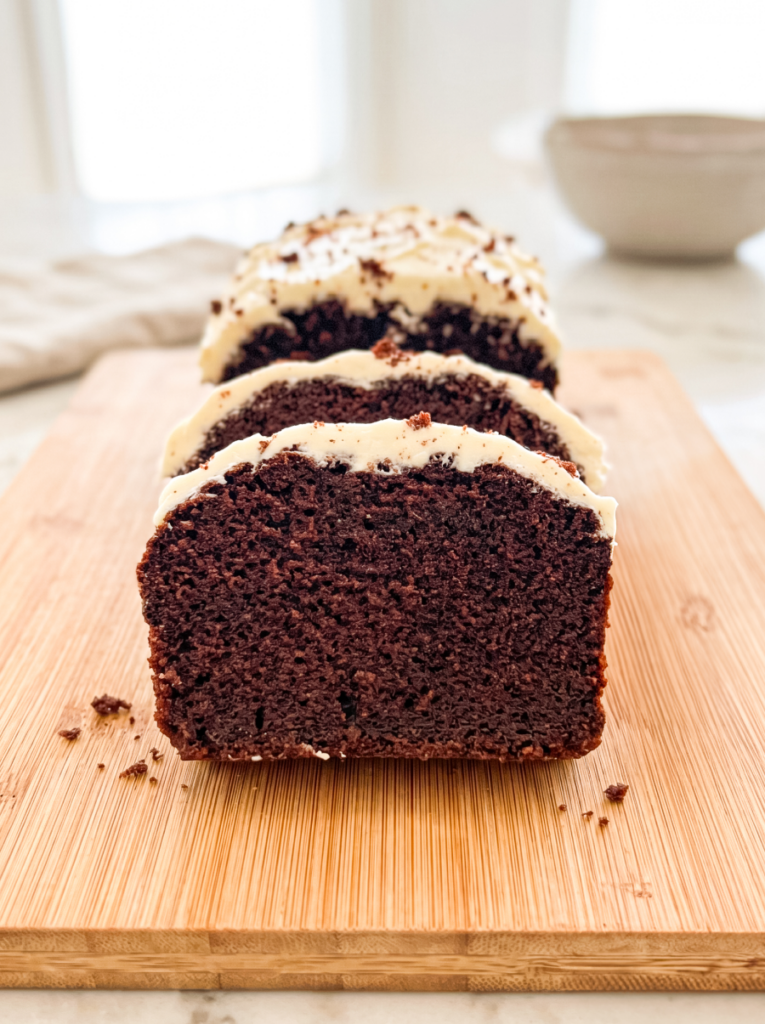
Tips for making red velvet loaf cake
- Use brick-style cream cheese, not spreadable – the spreadable kind has stabilizers that make the frosting too loose to hold its shape on top of the loaf. Block cream cheese gives you the structure you need.
- Let the butter and cream cheese come to room temperature before mixing – cold cream cheese won’t whip smooth, and you’ll end up with lumps no amount of beating will fix. Leave both on the counter for an hour before you start the frosting.
- Add the hot water last and don’t overmix – pouring it in after the flour keeps the batter from developing too much gluten, which would make the crumb dense. Whisk just until smooth, then stop.
- Start with red velvet emulsion if you can find it – it’s more concentrated than liquid food colouring, so you need less to get a true red, and the colour doesn’t fade as much in the oven. If you only have liquid dye, start with a tablespoon and add more until the batter looks red, not coral.
- Warm the frosting slightly before spreading – a few seconds in the microwave makes it spreadable without being runny, so you can smooth it on top without tearing the cake. You want it thick enough to hold a swirl but loose enough to glide.
Frequently Asked Questions
Can I use buttermilk instead of regular milk in this red velvet loaf? Yes, but cut the baking powder to 1 1/2 teaspoons and add 1/4 teaspoon baking soda to balance the acidity. Buttermilk will give you a slightly tangier flavour and a more classic red velvet taste, but regular milk works just fine if that’s what you have.
How do I store this red velvet loaf cake and how long does it last? Keep it covered at room temperature for up to two days, or refrigerate it for up to five. The frosting has cream cheese, so it needs to go in the fridge if your kitchen is warm. Let it sit out for 20 minutes before serving if you refrigerate it — cold cake is never as good.
Can I freeze this loaf cake? Freeze the unfrosted loaf wrapped tightly in plastic wrap and foil for up to three months. Thaw it in the fridge overnight, then bring it to room temperature and add the frosting right before serving. The frosting doesn’t freeze well on its own, so always make it fresh.
Why did my red velvet loaf turn out dense instead of soft? You probably overmixed the batter after adding the flour, which develops the gluten and makes the texture heavy. Whisk just until the dry ingredients disappear, then stop. Also check that your baking powder isn’t expired — old leavening won’t give you the lift you need.
Make sure to tag me @theflournook on social media and leave a review below if you make this classic red velvet loaf cake. To pin this recipe and save it for later, you can use the button on the recipe card, the buttons above or below this post, or on any of the photos above.
Happy baking!
Red Velvet Loaf
- Total Time: 1 hour 10 minutes
- Yield: 8 servings 1x
Description
This red velvet loaf cake is soft, cocoa-forward, and topped with tangy cream cheese frosting. The batter whisks together by hand in two bowls, and the loaf pan format skips the stress of layering.
Ingredients
Cake
- 1 cup (120 grams) all-purpose flour
- 1/2 cup (50 grams) unsweetened cocoa powder
- 2 teaspoons (8 grams) baking powder
- 1/4 teaspoon (1.5 grams) salt
- 2 large eggs, room temperature
- 3/4 cup (150 grams) granulated sugar
- 1/2 cup (113 grams) unsalted butter, melted
- 1/2 cup (120 milliliters) milk, room temperature
- 1 1/2 teaspoons (7 milliliters) vanilla extract
- 1/4 cup (60 milliliters) hot water
- 1 tablespoon (15 milliliters) red velvet emulsion or red food colouring (adjust to achieve desired colour)
Frosting
- 1/4 cup (57 grams) unsalted butter, softened
- 4 ounces (113 grams) cream cheese, softened (brick-style, not spreadable)
- 1 teaspoon (5 milliliters) vanilla extract
- 1/4 teaspoon (1.5 grams) salt
- 1/4 cup (30 grams) powdered sugar
Instructions
Cake
- Preheat your oven to 350°F (175°C). Line a 9×5 inch loaf pan with parchment paper or grease it with butter.
- Whisk together the flour, cocoa powder, baking powder, and salt in a small bowl. Set aside.
- Whisk the eggs and sugar together in a medium bowl until just combined. Add the melted butter, milk, and vanilla extract. Mix until smooth.
- Add the flour mixture to the wet ingredients and whisk until almost combined. Pour in the hot water and food colouring, then whisk until the batter is smooth and vibrantly red.
- Pour the batter into your prepared loaf pan and bake for 45 minutes, or until a toothpick inserted into the center comes out clean.
- Let the cake cool completely in the pan before transferring it to a wire rack.
Frosting
- Beat the softened butter and cream cheese together in a small bowl until creamy and smooth.
- Add the vanilla, salt, and powdered sugar. Beat until smooth. Microwave for a few seconds until the frosting is slightly pourable but still thick.
Assembly
- Once the cake is completely cool, pipe or spread the frosting over the top. Let it sit for a few minutes to set slightly, then smooth the surface if desired. Slice and serve.
Notes
The hot water loosens the batter and helps the cocoa bloom, giving you a richer flavour and softer crumb. Don’t skip it.
If your frosting is too stiff to spread smoothly, warm it in the microwave for 5-10 seconds at a time. You want it spreadable but not runny.
Red velvet emulsion gives a deeper, more stable colour than liquid food colouring, if you’re using liquid dye, start with a tablespoon and add more until the batter looks red, not pink.
- Prep Time: 25 mins
- Cook Time: 45 mins
Leave a Reply