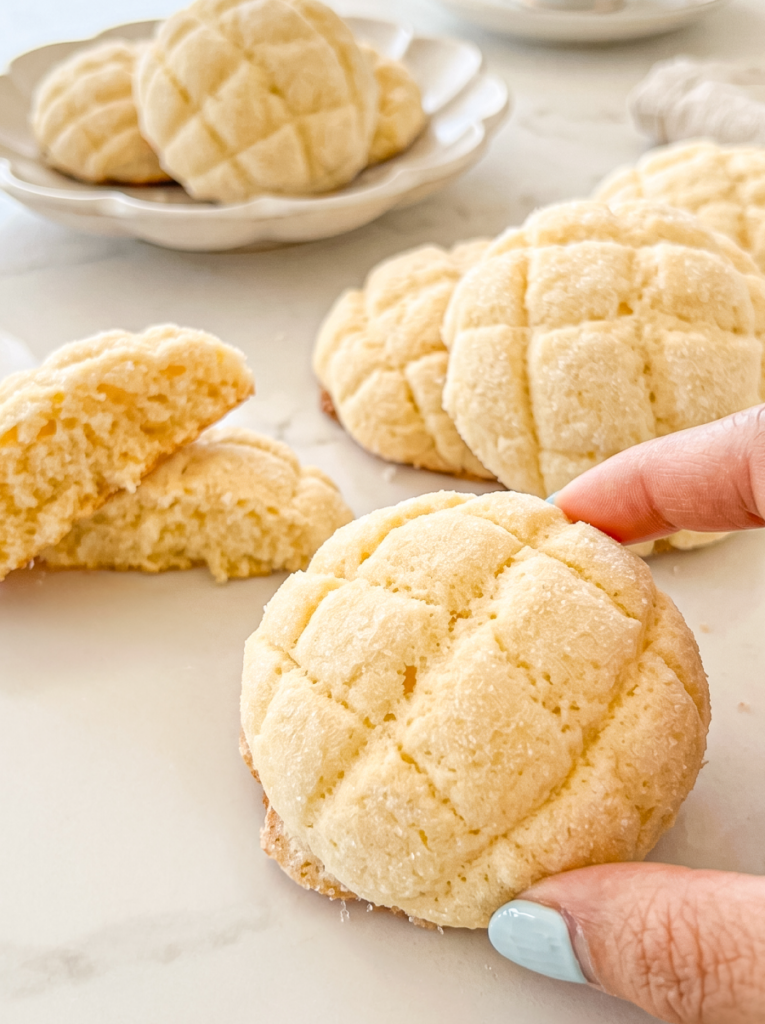
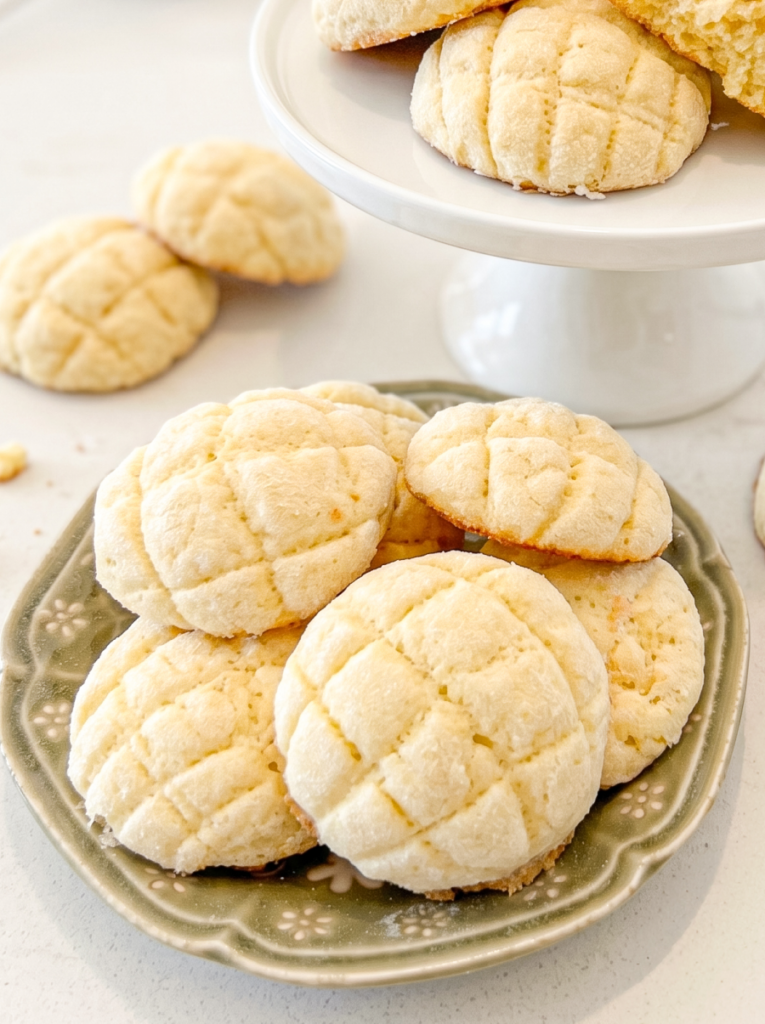
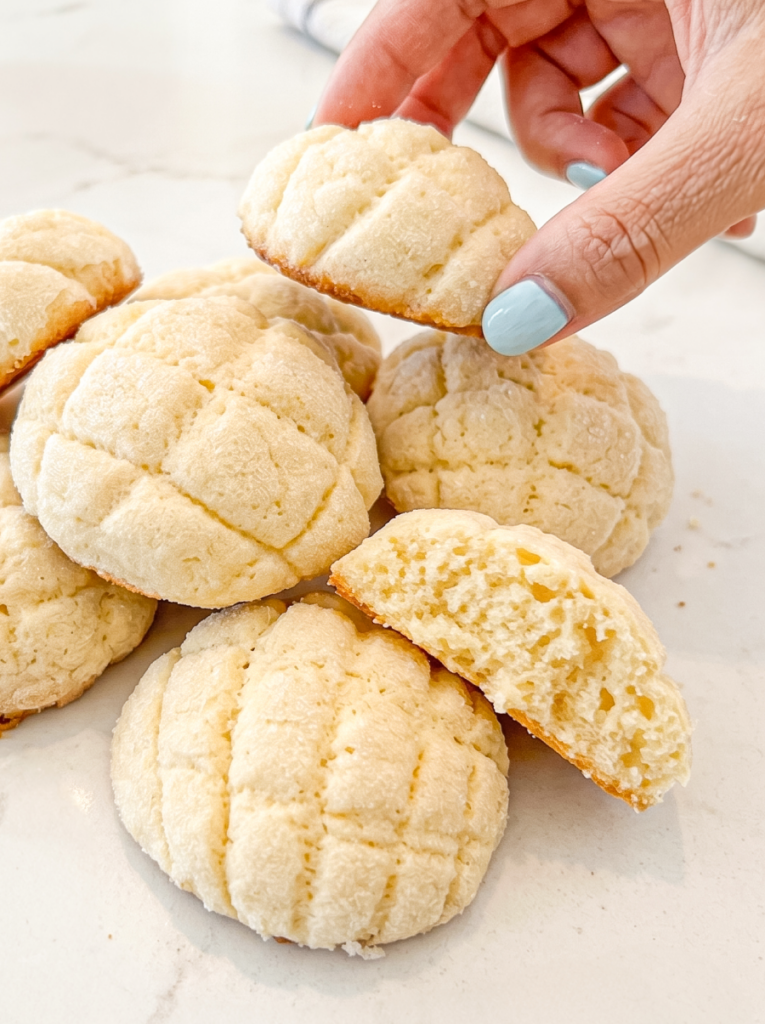
I have been so excited to share these Melon Pan Cookies! To the point where I made them three times last week (oops) and I am not sorry about it. If you’ve ever walked past a Japanese bakery and caught a glimpse of those crisscross-topped buns, you know exactly the appeal. That sweet, crisp, crackly exterior over a soft, fluffy interior is just perfect!
The thing is, making actual melon pan buns can take some time! There’s yeast dough involved, multiple proofs, a whole situation. But these cookies are a faster way to that signature texture and taste that’s WAY easier to make at home. You get that sweet, crunchy top and then a tender cookie underneath.
I promise you, these are going to be your new favourite cookies. 🙂

What is Melon Pan, anyway? (And why no melon?)
“Does it taste like melon?” And the answer is a resounding no (unless you add melon flavouring, which isn’t traditional, and I personally don’t recommend it). So, why is it called melon pan? It’s all about the appearance, not the flavour. The crisscross scoring on top and the slightly rounded shape, is meant to resemble a cantaloupe or musk melon. “Pan” just means bread in Japanese.
Now, if you’re thinking, “Wait, this sounds a little like a pineapple bun!” (or bo lo bao), you’re not wrong! They share a similar concept: a crunchy, sweet cookie topping baked over a softer bread or, in our case, a cookie base.
Ingredients
- Unsalted butter
- Granulated sugar
- Large egg
- Cake flour
That’s it!!
*These are the main ingredients. The full list of ingredients and measurements can be found at the bottom of this post!*
The Key to the Signature Crispy Top
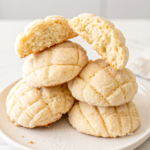
Getting that distinct melon pan top is actually super straightforward. There are two main things: a generous sugar coating, and the scoring.
First, after you’ve rolled your cookie dough into balls (more on that in a sec), you roll them in a bowl of granulated sugar. This isn’t just for sweetness (though it certainly helps), it’s crucial for the texture. As the cookies bake, that sugar caramelizes and forms that thin, crisp, crackly crust that is THE characteristic of melon pan.
Then comes the scoring. You’ll take a bench scraper or a butter knife and gently press a crisscross pattern onto the top of each sugar-coated dough ball. You’re not trying to cut all the way through the cookie, just making shallow marks.
Equipment
- Kitchen scale (I like to weigh out most of my ingredients for accuracy, I also think it’s more efficient when measuring things out over measuring cups!)
- Large and small mixing bowls
- Measuring cups and spoons
- Whisk or hand mixer
- Bench scraper or butter knife
- Large baking sheet
- Parchment paper
- Wire cooling rack
Tips for the Best Melon Pan Cookies
- Mind the dough stickiness: The dough for these melon pan cookies is naturally a little sticky. I find that wearing a pair of food-safe gloves when I roll the dough balls makes the whole process much tidier and easier to manage.
- Don’t overmix the flour: Once you add the cake flour, mix only until it’s just combined. Overmixing will develop more gluten, and we want a super tender cookie here.
- Go light on the scoring: Remember, you’re not trying to slice through the cookie. Just a gentle crisscross pattern on the surface is all you need to get that signature look.
Alright, that’s all from me on these small batch melon pan cookies. I can’t wait for you to try them.
If you make these melon pan cookies, please tag @theflournook on socials and leave a review below! You can pin or save this recipe using the buttons on the recipe card, the buttons around this post, or any of the photos above.
Happy baking, friends! 🙂
For more easy cookie recipes, check out these:
Melon Pan Cookies
- Total Time: 51 minutes
- Yield: 8 cookies 1x
Description
These Japanese melon pan cookies feature a tender, light cookie base with a distinctively sweet, crisp, and crackly sugar-coated top. Each cookie has a decorative scored pattern resembling a cantaloupe, creating a unique texture contrast.
Ingredients
Cookie Dough
- 3 tbsp (45 g) unsalted butter, softened
- 1/4 cup (50 g) granulated sugar
- 1 large egg, at room temperature
- 3/4 cup (90 g) cake flour
Coating
- 2 tbsp (28 g) granulated sugar
Instructions
- Preheat your oven to 180°C (350°F). Line a baking sheet with parchment paper or a silicone baking mat.
- In a large bowl, beat the softened unsalted butter with 1/4 cup (50 g) granulated sugar until the mixture turns pale and fluffy.
- Add the egg and continue mixing until fully combined.
- Sift the cake flour into the butter mixture and gently mix until just combined. The dough will be sticky.
- Weigh out 28 g of the dough for each cookie and roll into a smooth ball using your hands.
- Roll each dough ball in the granulated sugar to coat the exterior.
- Use a bench scraper or a butter knife to lightly score a crisscross pattern on the top of each cookie.
- Place the shaped cookies on the prepared baking sheet. Chill them in the freezer for 5 minutes, or in the refrigerator for 10 minutes, to help the dough firm up.
- Bake the cookies for 16 minutes, or until the edges are lightly golden and the cookies are crisp.
- Allow the cookies to cool on the baking sheet for a few minutes before transferring them to a wire rack to cool completely.
Notes
My dough is quite sticky, so I find wearing gloves helps a lot when I roll the balls.
Chilling the dough before baking is a key step. It helps the cookies hold their shape better and keeps those crisp edges.
When scoring the tops, use a light hand. You just want to make a shallow pattern, not cut deep into the dough.
- Prep Time: 35 mins
- Cook Time: 16 mins
- Category: Cookies
- Method: Baking
Leave a Reply